Links contained in this post and elsewhere on my website may include affiliate links. When you make a purchase through these links, I earn a commission at no additional cost to you. I only link to products and services that I love - and that I think you will love, too!
Last year I successfully started valerian from seed using soil blocks. More plants are on the list for this year, and Sunday seemed like an excellent time to work on that particular project. I pulled out my potting soil bin and set to work. Read on to discover more info about why I use soil blocks and how you can make your own.
It’s perfectly normal to have a handmade, secret-recipe box of dirt among one’s possessions, right??? Don’t judge. . . Actually, it’s not a top-secret recipe per se. It’s the recipe from Mel Bartholomew’s Squar Foot Gardening book. You can also find a good recipe by Eliot Coleman over on Johnny’s Select Seeds.
Benefits of using soil blocks
Now, I’m not a big fan of plastic pots for starting seeds. For one thing, they are a pain to find space for and keep organized when not in use, for another they can harbor diseases from one year to the next. AND you can end up with icky little, root bound, unhappy seedlings. At least, if you’re like me, and may or may not have time to “pot-up” and move the plant into successively larger pots until you are ready to plant out.
The solution? Soil blocks!
Essentially, these are mud pies for plants. The potting mix contains perlite, peat moss, and compost, and is mixed with water until it is the right consistency, and then a “blocker” is used to squish out the water and shape the dirt into little blocks. Professional grade blockers can run anywhere from $30 to $200. Instructables instructions for making your own? Check.
Oooor, you could do what I did.
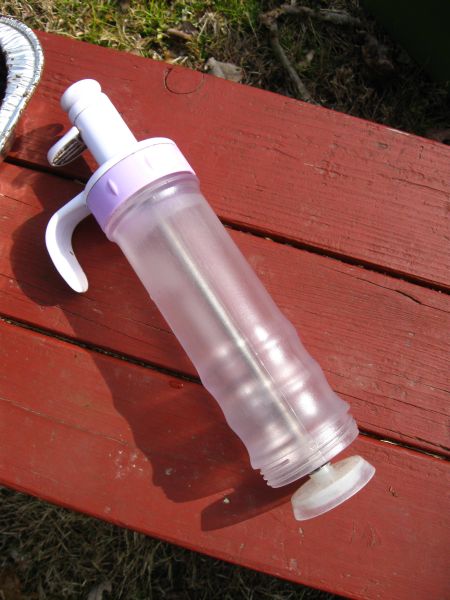
Wandering through a craft supply store I spied a cake decorating tool on an endcap display. On clearance for $10.
I bought it.

How to make soil blocks with a cake decorating tool
It’s supposed to hold icing, but it works just as well, without the tips, to hold dirt. To use for soil blocks:
- Pull the plunger back about two inches.
- Fill it with soil block mix.
- Stand the icing-tube-turned-blocker upright into an aluminum lasagna pan.
- Press the plunger down to squeeze out the extra water.
- Use the thumb trigger to slide the tube off the freshly-minted block.
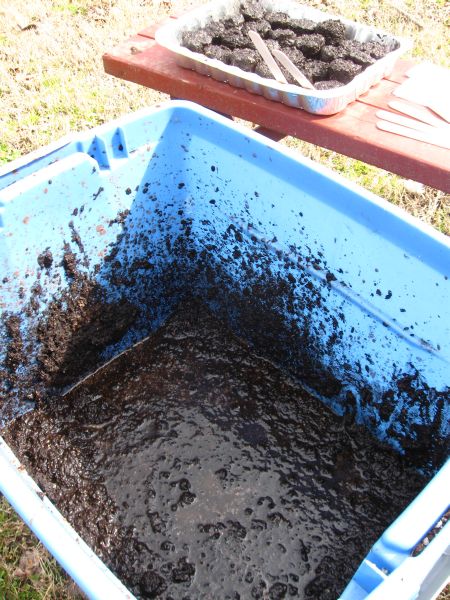
Forgive me for not having step-by-step pictures- it’s a messy process and I didn’t have anyone with clean hands around to help. As you can see in the picture above, it also cleans up pretty nicely when you’re finished.
I like my tub-o-dirt pretty soupy, but feel free to play around and decide what works best for you. You want a finished block that holds it’s shape without either oozing into a pudding blob, or crumbling when you apply pressure to add the seeds.

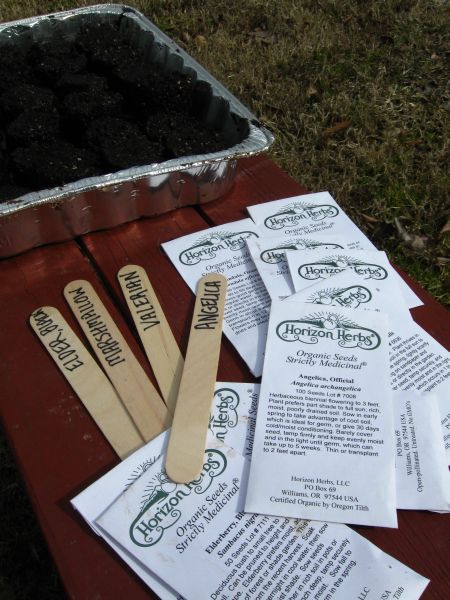
Finished soil blocks below
The finished soil blocks are visible in the upper left, below. It’s ok if they aren’t all exactly the same size. At first, the blocks are going to be a bit fragile, but as the seedlings grow the roots help hold the blocks together.
One of the main benefits of soil blocks is that the root systems of soil-blocked seedlings are much healthier than their pot-started counterparts. When a root grows to the edge of the block and is exposed to air, it stops growing. The plant puts energy into branching its root system, rather than growing longer roots that grow around and around in circles between the edge of the pot and the soil.

This year I’m starting bee balm, angelica, marshmallow, hawthorn, elder, valerian, and calendula from seed. I’ve always been really happy with Horizon Herbs/Strictly Medicinal Seeds(as you can see from the picture!), but I’m not affiliated with them in any way. I do think their packets are quite pretty, and love that they give so much info on the best practices for starting each type of seed.
Now I just have to decide where to keep my seed tray until everything germinates. Last year I tried the front porch, but it doesn’t get quite enough sun. The interesting part will be finding some place with enough sun that the barn cats won’t think of. . .
Stratifying soil blocks and herb seeds for best results
Some herb seeds need exposure to cold before they will germinate. This process is called stratification, and you can read how to do it in my post How to Stratify Herb Seeds.
This post was originally published February 10, 2014. Updated on December 28, 2021.

