Links contained in this post and elsewhere on my website may include affiliate links. When you make a purchase through these links, I earn a commission at no additional cost to you. I only link to products and services that I love - and that I think you will love, too!
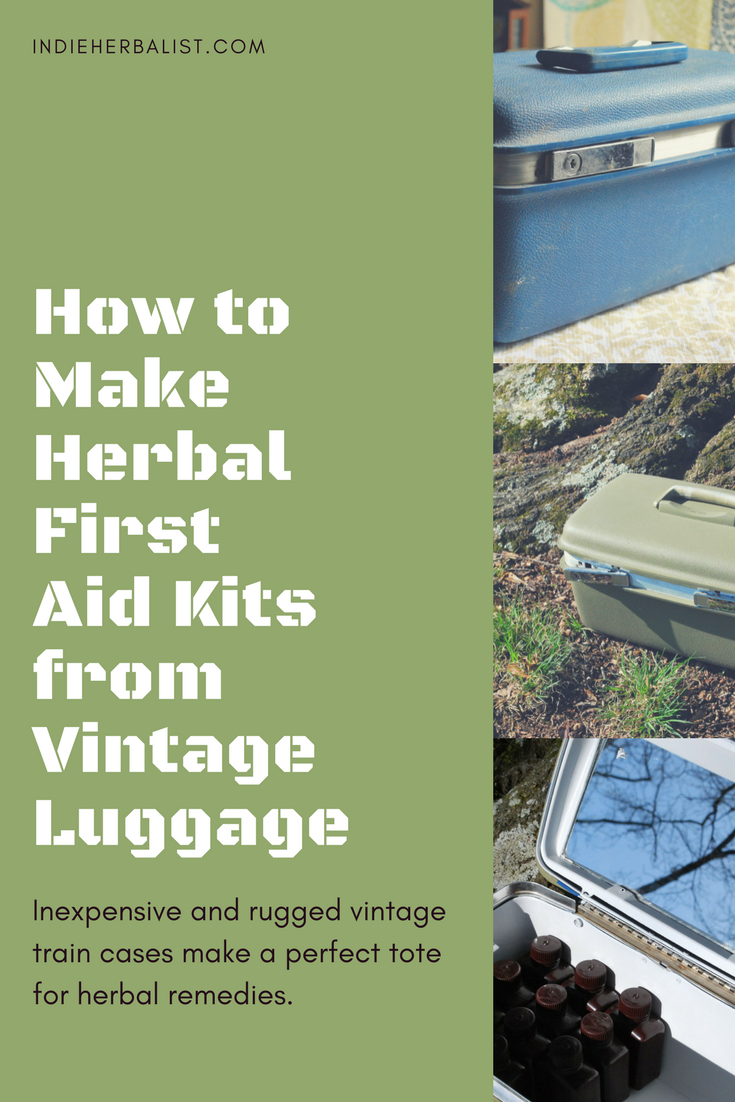
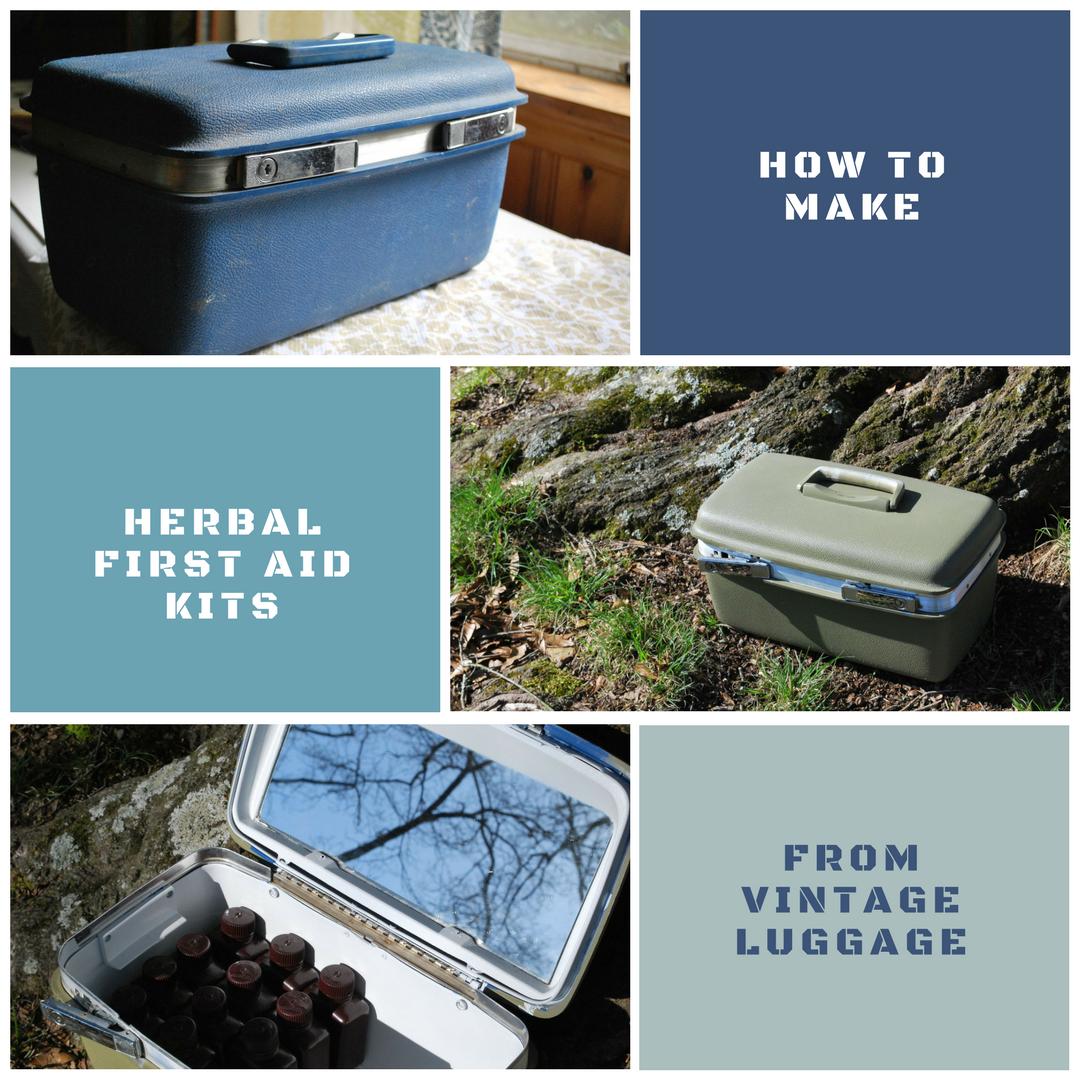
If you are interested in building out an herbal first aid kit, let me take a moment to warn you: it can easily become a bit of an obsession. There are many different styles and purposes of kits to explore. You may find that you become preoccupied with experimenting on new ideas, potential scenarios, and gear. What follows is a perfect example- a happy coincidence that involves a chance meeting with a vintage train case.
My boyfriend and I were poking around in one of the farm outbuildings recently, tidying up, and found a vintage train case. It was in pretty good shape and it was sturdy, so I wanted to find a new use for it instead of throwing it out. I’ve been looking for an inexpensive container for adding on to my herbal first aid kit . . . so of course I thought I would try it out!
It’s working so well that I wanted to share how I did it for the sake of any other “use it up, wear it out, make it do or do without” herbalists that might be on the look out for some good first aid kit ideas. Here’s what I really like about it, and some before and after pics.
What I love about this kit
- It’s the perfect size for the square nalgene bottles I like – and lots of them!
- Even when full it isn’t too heavy or unwieldy and I can grab it and move quickly if needed.
- Because it’s missing the tray that normally goes with vintage train cases it has just enough room for a materia medica reference or a notebook.
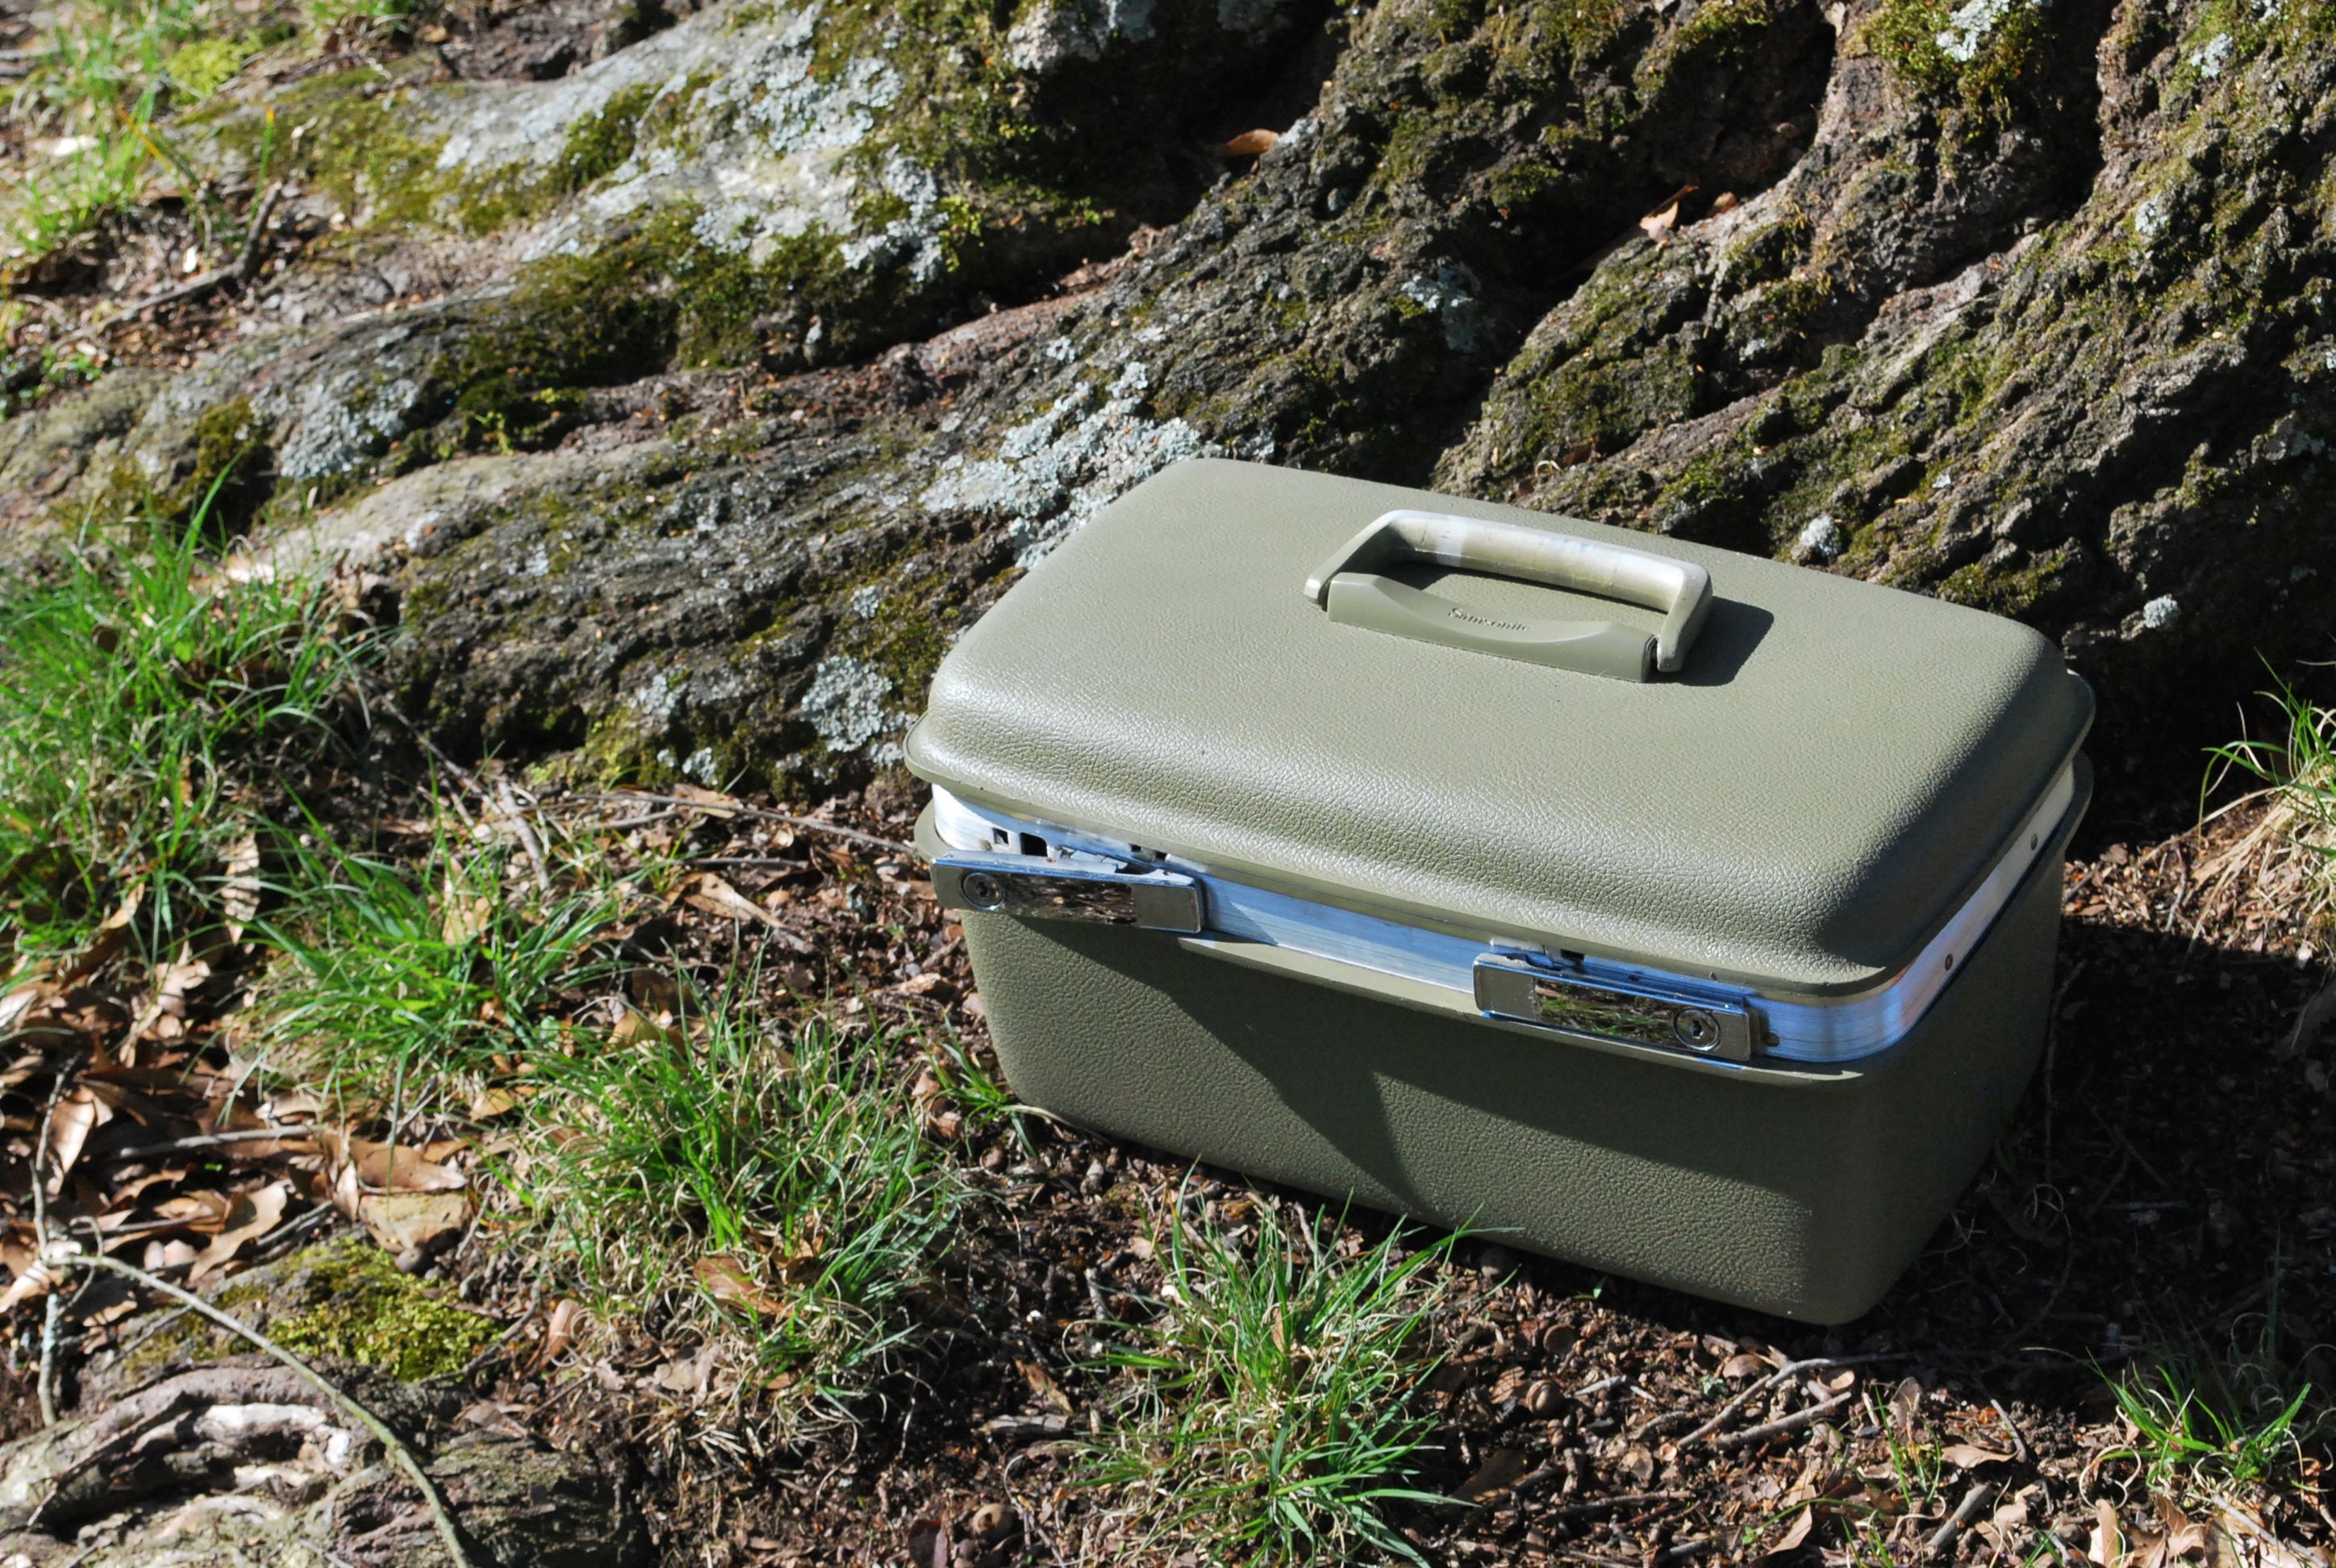
- It was pretty shabby to begin with, and also free. So I have absolutely no remorse when lugging it around with me on the farm where it will definitely end up dusty and muddy at different points in its new career.
- It cleaned up nicely enough that I actually don’t mind showing it off, either – which means I will happily drag it around to different events and probably take it camping.
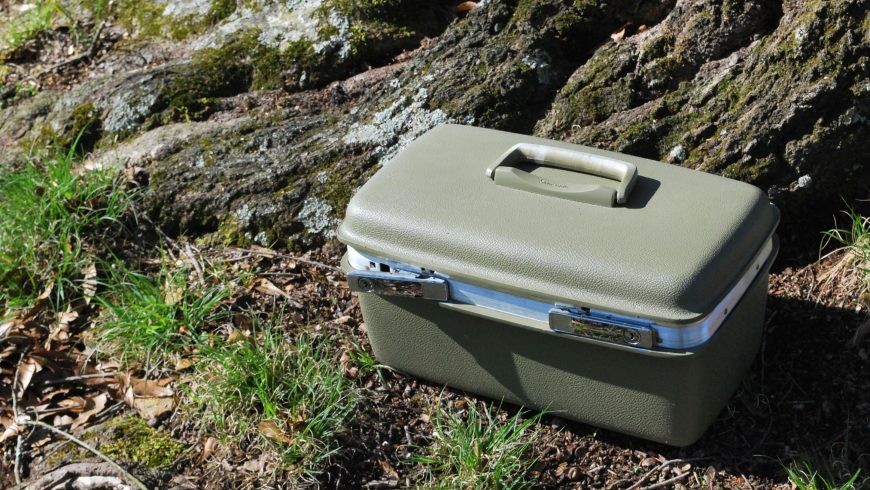
- Vintage doesn’t mean flimsy. This case is pretty rugged, especially when compared to most of the plastic totes and tackle boxes I’ve seen.
- Interior is easy to keep clean.
The only downside I can see so far is that the hinged lid is pretty heavy. When the case is open and not packed full enough to keep it steady, the lid can cause it to topple over backwards if it is on uneven ground. It’s easily propped up on a car tire, tree root or whatever else is handy so that doesn’t bother me, but it’s still worth mentioning.
Sussing Out the Potential First Aid Kit
Ready for those before and after pics? This is the case in all of its grimy glory, when I first brought it inside to examine it more closely.
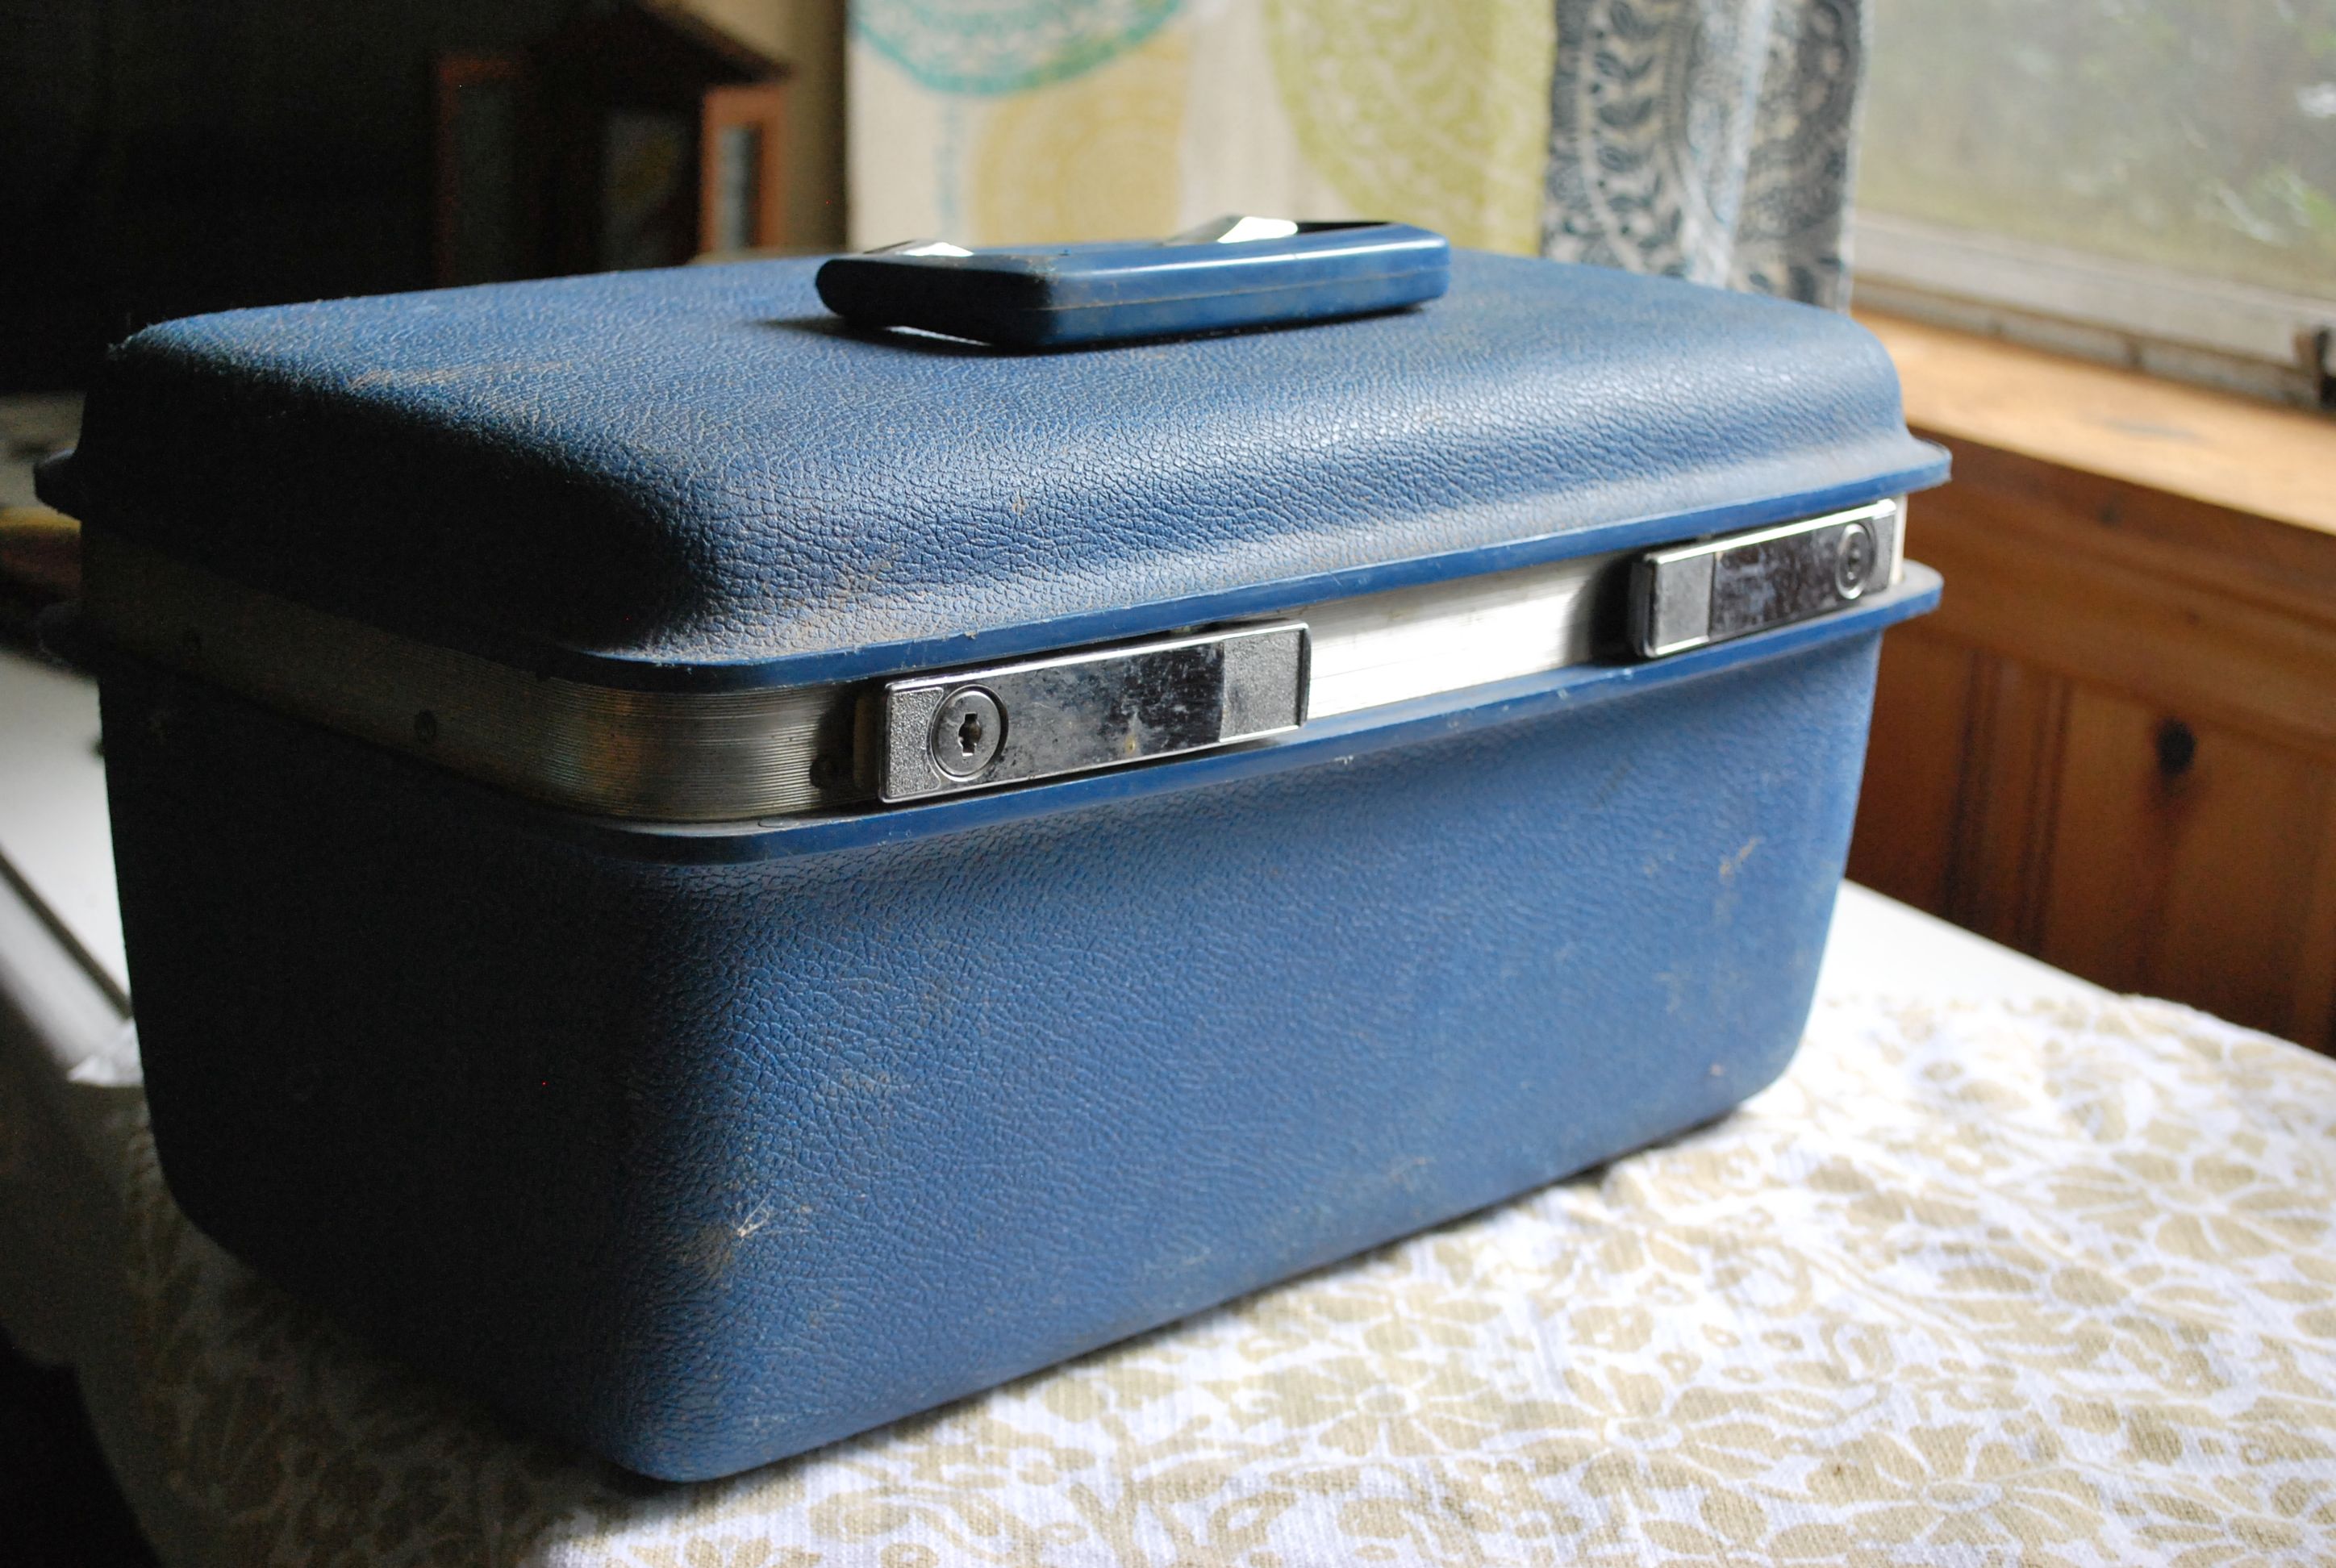
A little scruffy, but not too bad. Depending on your model of train case, you may have nasty, musty faux-silk pockets and lining to rip out. This one didn’t, although it was also missing the divided jewelry or cosmetics tray that usually goes inside. Anyway, the only thing I needed to remove here was the nasty, musty hinge cover.
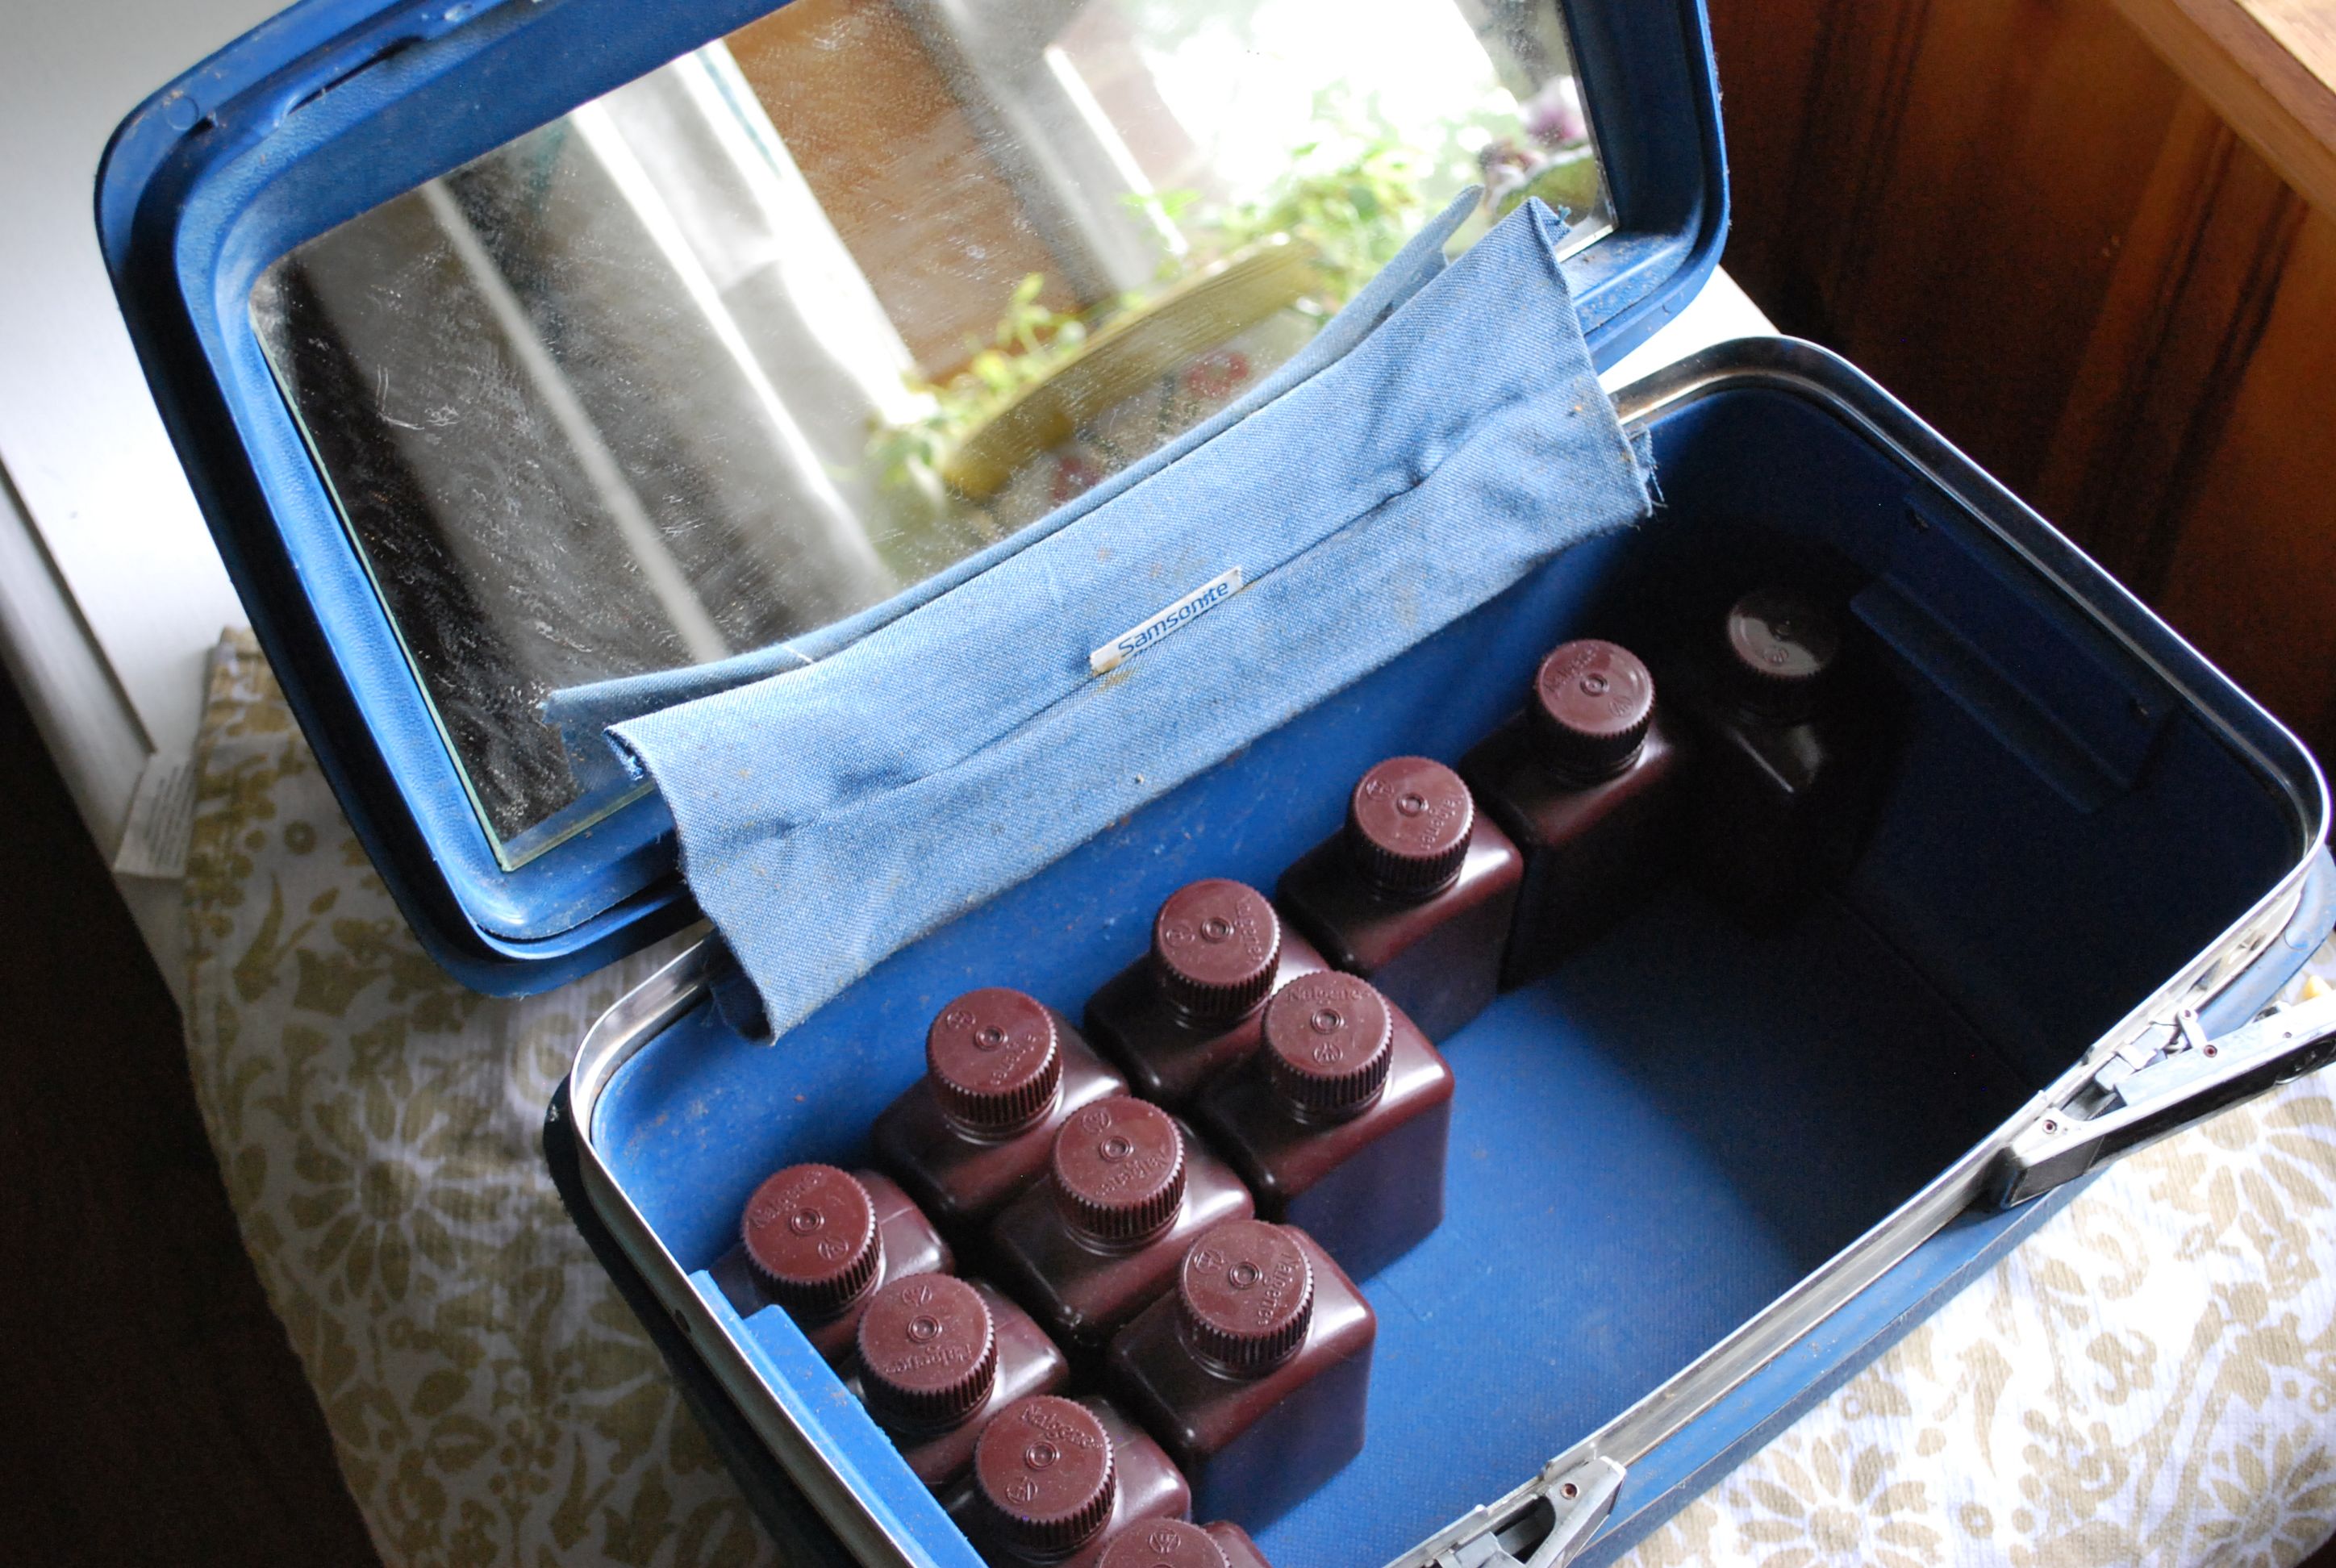
Of course I grabbed some Nalgene bottles to see how well they would fit in the new kit. . . .
Nice! Roomy, and the bottles fit very snug when the case is packed full. That sealed the deal for me. It was at least worth some spray paint and a trial run.
From Vintage Luggage to Herbal First Aid Kit
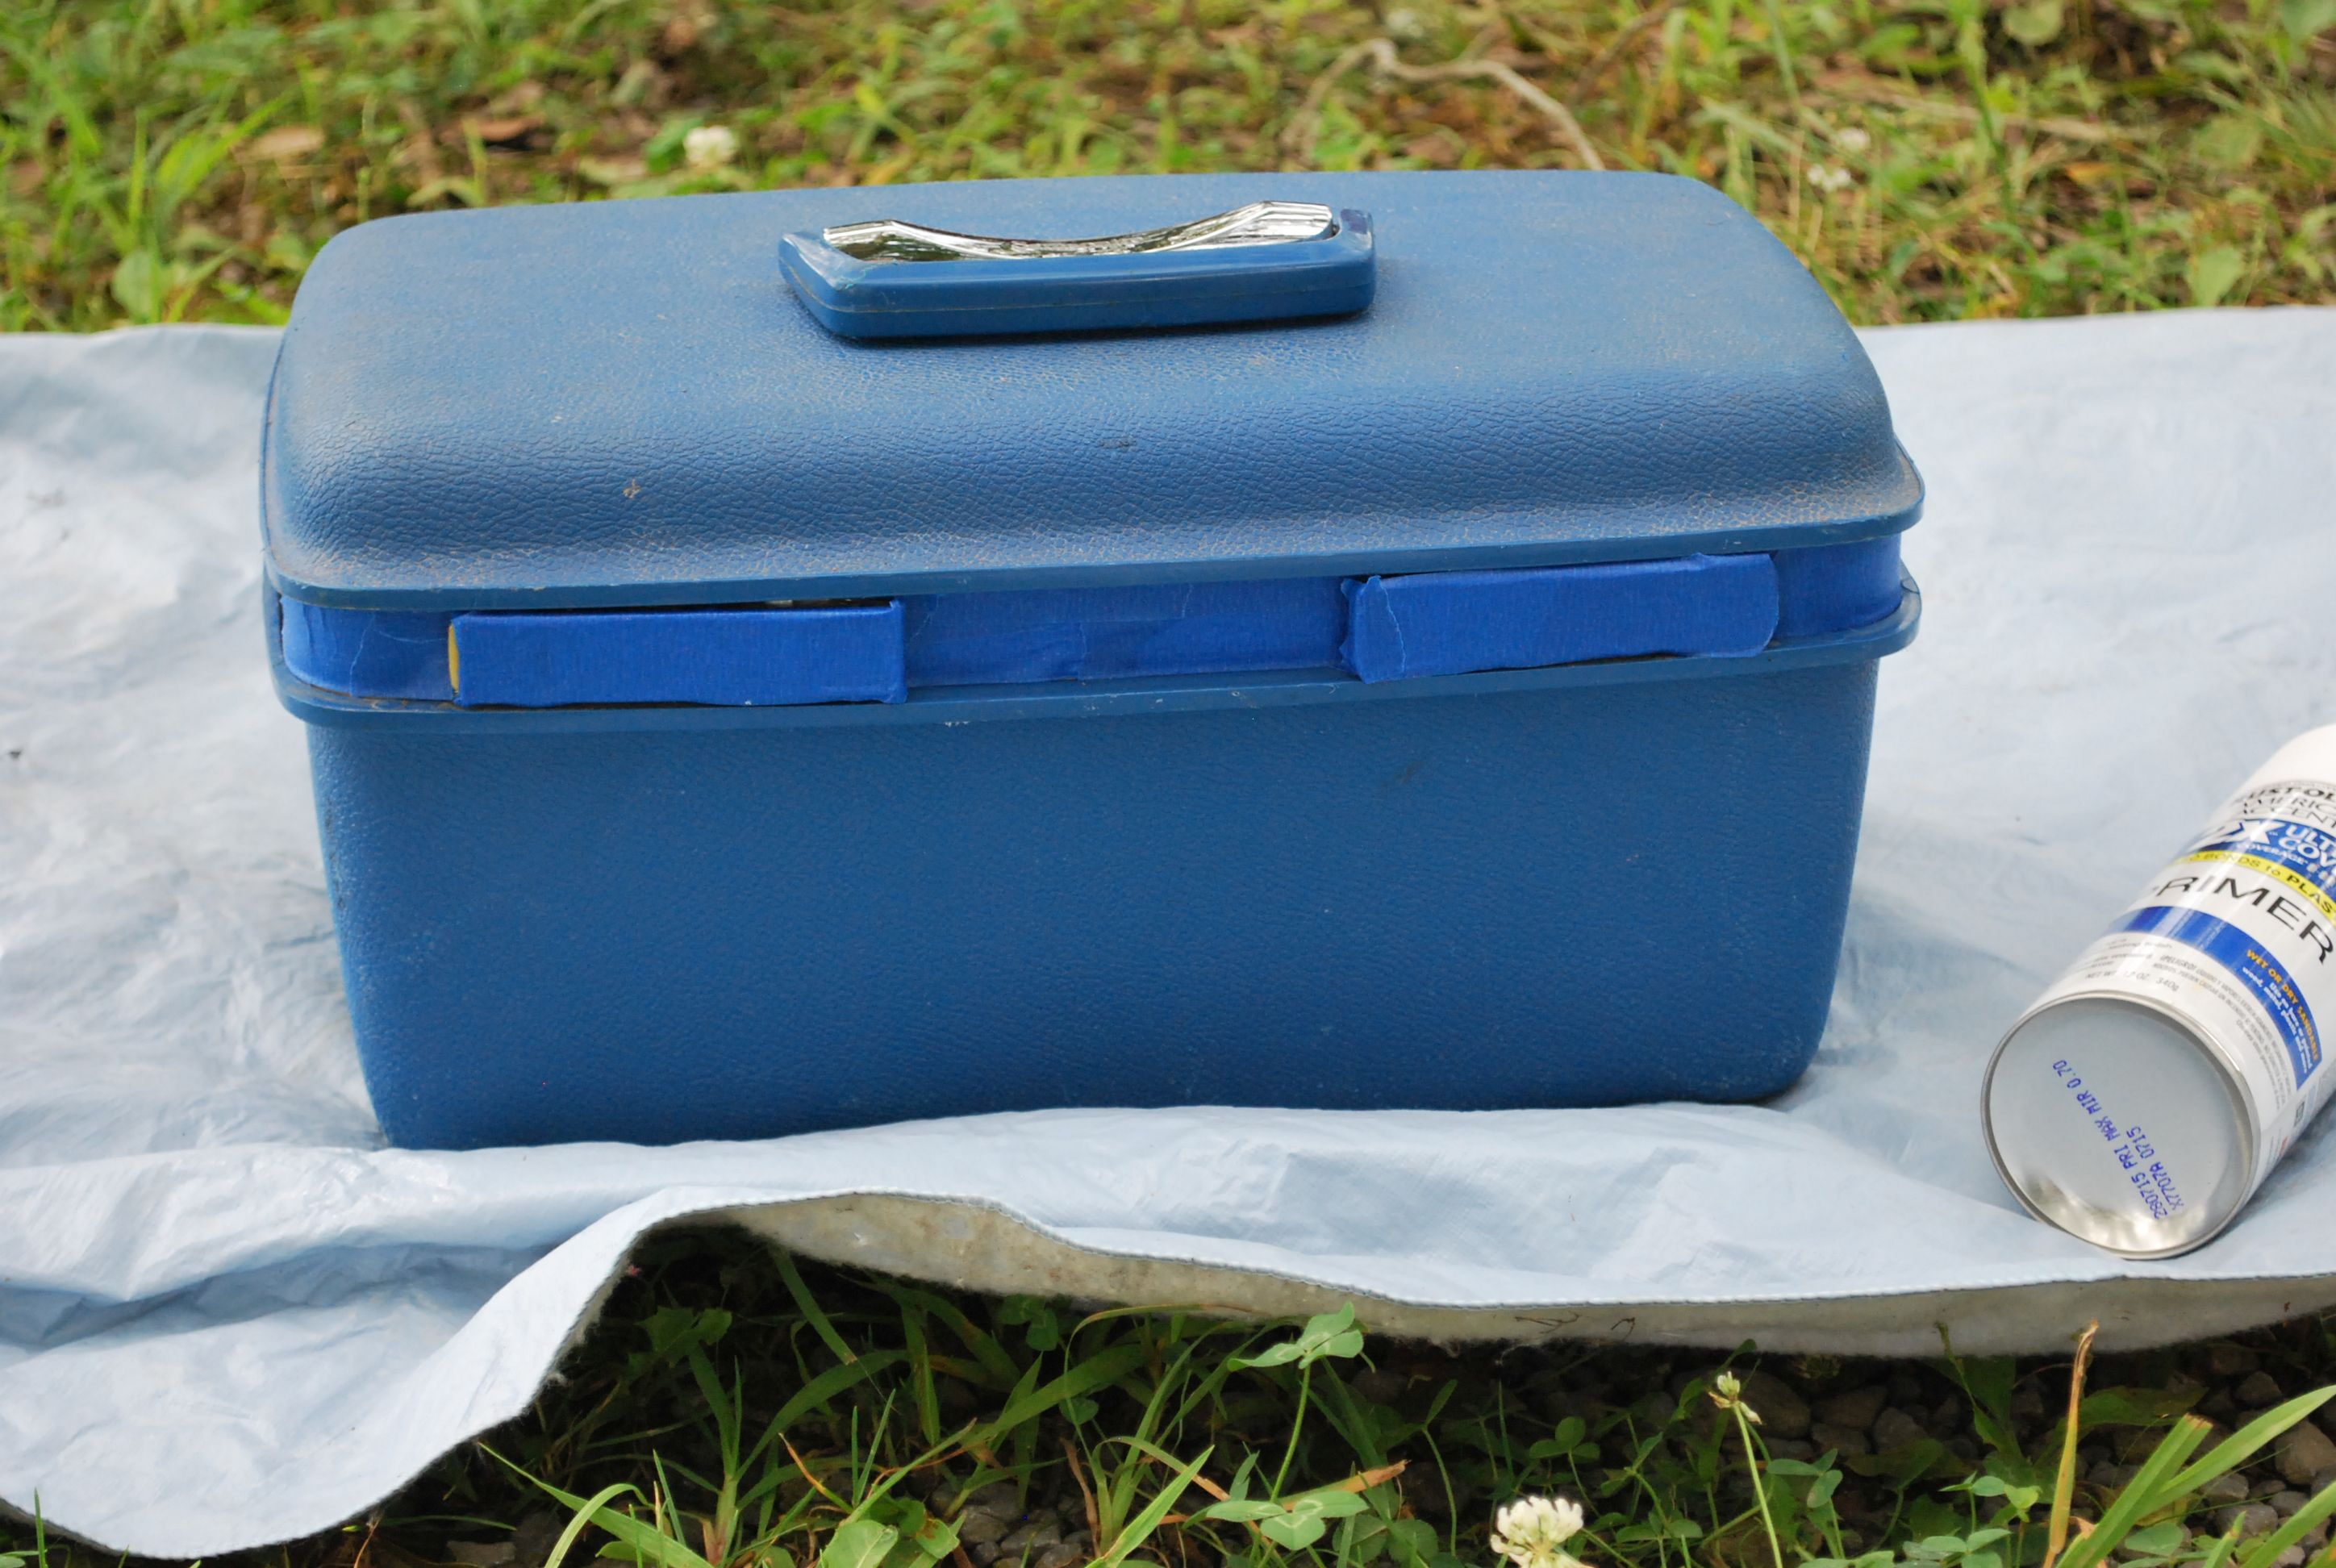
The next step was getting rid of the hinge cover and tackling it inside and out with a good scrubbing.
Once everything was clean, I used blue masking tape to cover the metal parts I didn’t want to spray paint. Taping up in process:
This isn’t a sponsored post, but in case you were wondering: I used American Heritage paints by Rustoleum. I like using them for my painting projects because they have a light-touch spray button that keeps you from cursing the whole time you paint. You know. . . about how badly your hand and wrist hurts and why the heck did you think this was going to be a fun project, etc. Been there, done that! I find that with these you typically won’t have to curse at all. Unless you just enjoy cursing while you paint as a sort of art therapy. Be my guest, I’m not judging. . .
Also, I used a primer on this project for good measure. If your not so fussy I also won’t judge, but I’m not sure how well the paint will stick to the case without a primer – so you might be in for some more cursing.
I used an olive green matte on the outside, but a nice shiny white for the inside. Entirely your choice on the colors, of course!
Tips for Making Your Own Herbal First Aid Kit from Vintage Luggage
You can see that my taping job was not perfect, alas – and even with the primer there are still a few scuffy spots. All in all, though, I think it turned out great!
By the way, I taped up the entire mirror on the inside of the lid before I painted. I thought it might come in handy for examining first aid needs on my own face – just in case! You could also just spray paint over it if you’d rather not have that much shiny to glare the sun in your eyes every time you open it.

If you’re looking for an inexpensive container for your own herbal first aid kit, I definitely recommend this option if you don’t mind spending a little time on a painting project. I recently found a second train case for less than $5, and it even has the tray!
As you can see, 12 of the four ounce bottles fit in one half of the case and there’s room for other gear (or, you can pack it full of bottles). A notebook or first aid handbook fits nicely on top with room for a pencil case (minus the tray).
Here are a few tips that might help you if you decide to try this out:
- Don’t skip the primer- yes, it’s an extra step but it helps cover old scuffs and helps the paint stick.
- Remember to spray paint in a well ventilated area (I prefer outside) and wear a dust mask.
- Keep paper towels handy to blot any areas that suffer drips and splatters from your over-zealousness.
- Use Nalgene bottles for your herbal extracts. Nalgene bottles are lighter than glass, won’t shatter, and won’t leach into your remedies.
- Don’t worry about perfect. It’s going to get scratched up a little in the course of being used. You might as well consider small imperfections as part of the deal.
All the best,
Agatha